Text: Claire Lessiau
Photographs: Claire Lessiau & Marcella van Alphen
Tagliatelle, spaghetti, pappardelle, ravioli, tortellini, trofie, pici… who has ever travelled to Italy knows there are many different varieties of pastas which almost all have their traditional accompanying sauces. It is in Siena that we are about to uncover the secrets of pasta-making, with the passionate chef Marta Ciappi, owner of Marta’s Cooking Classes.
Pin it for later:

It all starts with the flour
In the summer, the golden rolling hills of Tuscany are a hint into how important wheat is in the region. As good ingredients are the key to any good recipe, Marta proudly stands by a variety of packages of wheat flour, all grown and grounded in Tuscany, that she uses to home-make pastas.
Typical Italian pasta starts with grinding soft wheat. The level of refinement defines the flour type: 00, 0, 1, 2 or whole wheat. The flour obtained from the grinding of hard wheat, or durum wheat, is called “semolina” or “semola”. “This is the first difference with industrial pastas”, Marta explains passionately, as very processed and refined 00 all-purpose flour is often used.


Marta continues. “The W number indicates the strength of the flour, or its ability to absorb liquid and to keep carbon dioxide while rising.” The greater the number, the stronger the flour, the richer in gluten, making the dough more elastic and resistant which is essential for homemade pastas. “This is why you need a rather strong flour to make pastas, but the secret is in the mixing of the flours…” Marta describes.
“The other main difference with industrial pastas is the drying process. Industrial pastas are dried for a couple of hours at hot temperatures between 90 and 110°C to increase the production. This destroys the protein chains in the dough while homemade pastas are air dried at 38°C for three to six days, hence contain a lot more proteins and are easier to digest.”
Making the delicious pici from Siena
Pici are the typical pasta from Siena. If it takes a long time to prepare them, the dough is very basic and no machine is needed.
Type 0 or 1 flour has to be used, and Marta weighs 120 grams of type 1 flour on a wooden board and shapes a small well in its centre. Then it is a matter of incorporating properly about 75 grams of water to the flour, adding it bits by bits while stirring with a fork getting closer to the edge of the well to add more flour to the mix. Add a “C” d’olio as Marta says to describe the splash of olive oil. “Knead it and make sure it absorbs all the flour” Marta shows us. If the dough gets sticky, or if floury lumps stick to the board, she disposes of them and adds a bit more flour.


Then, Marta uses a roller to flatten the dough so that it is about 1 centimetre- thick, and she adds a thin layer of seed oil on top of the dough before covering it with a plastic film to have it rest for 20 minutes.
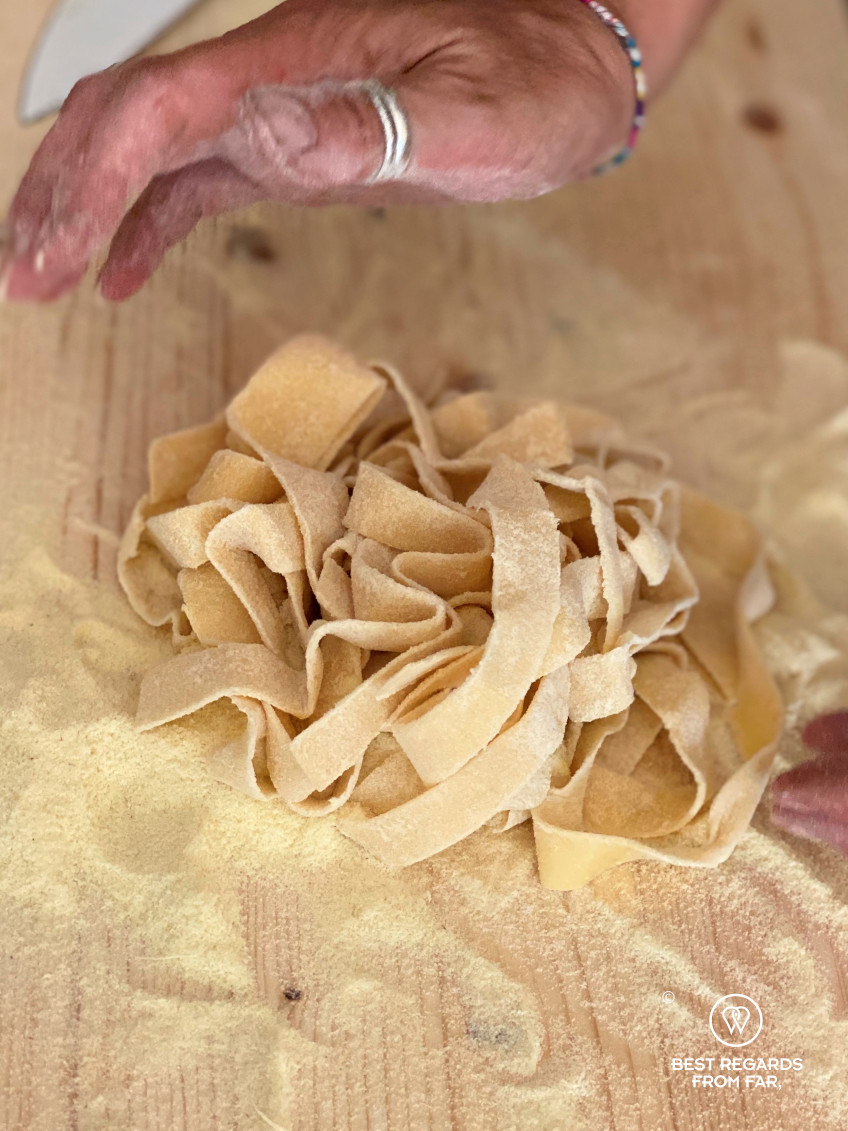
Once rested, we mimic Marta and cut a piece of dough to roll it with the palm of our greasy hands covered in sunflower oil. It is important to try and get a similar diameter along the length of the dough for cooking purposes. Once happy with our pici, we dip them into a bowl of semola flour before adding them to the pile of ready pici that just need to boil for a few minutes.
Traditional ravioli
The most traditional raviolis are filled with spinach and ricotta, and served with a simple butter and sage sauce.
The filling
Marta boils 300 grams of washed fresh spinach, then lets them cool down. Once cold, she squeezes the water out and we chop the spinach before mixing them with 500 grams of soft ricotta cheese and 80 grams of grated Parmesan cheese. Once the right consistency is obtained (by eye), we add a pinch of salt and nutmeg, and the filling is ready!

The pasta making for the ravioli
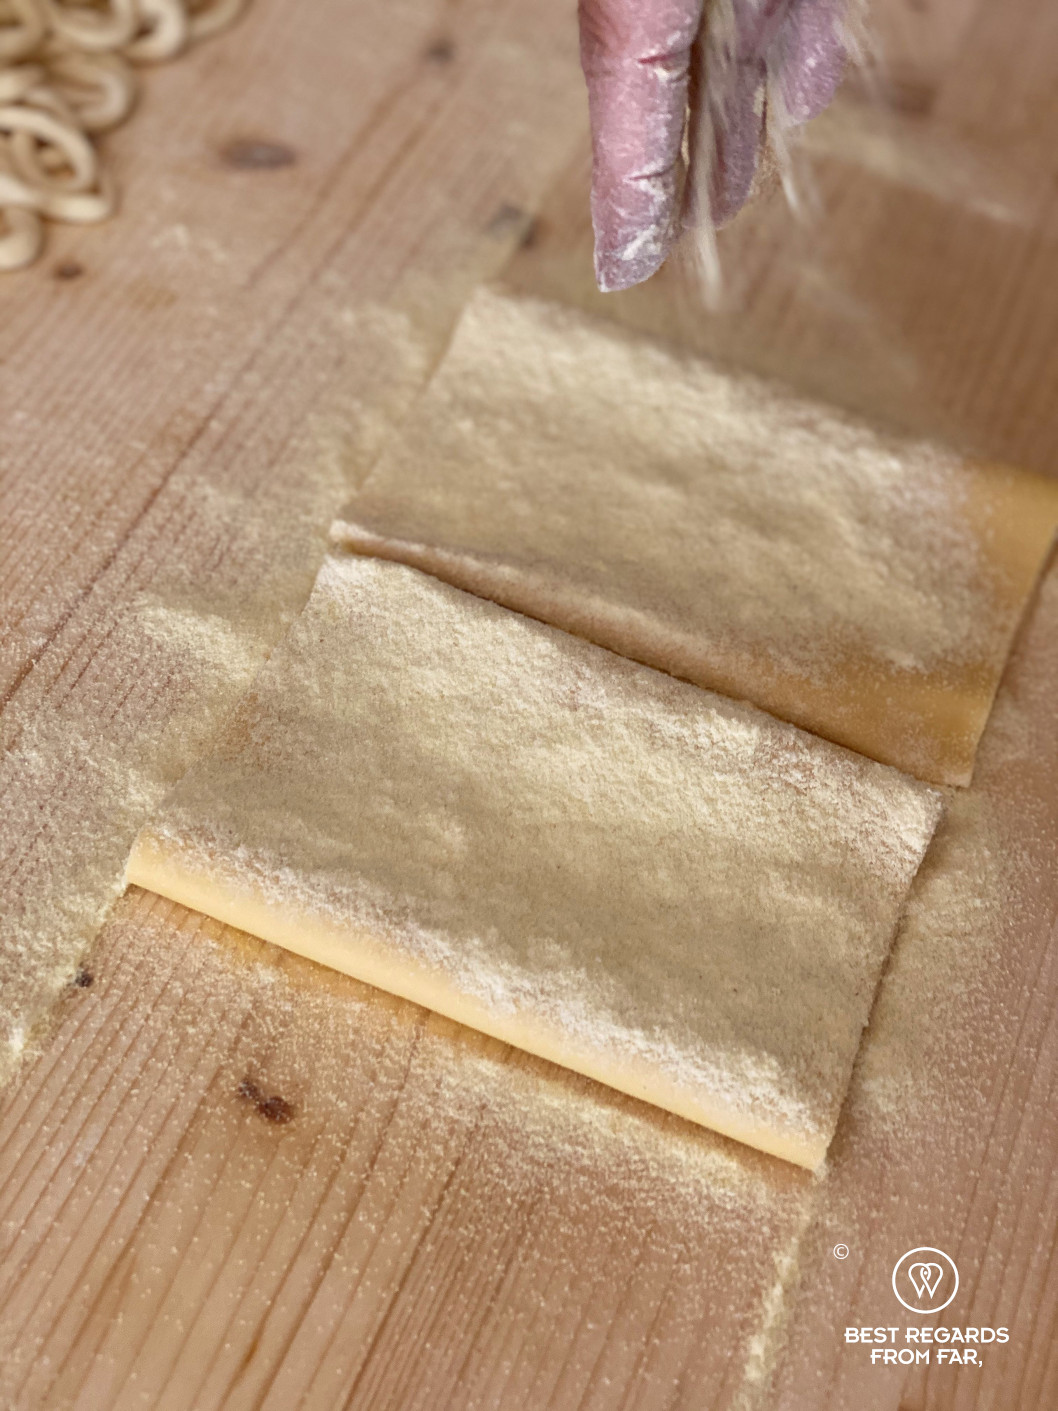
Count a bit of olive oil, a pinch of salt, one egg and 100 grams of flour per serving. As raviolis require a double strip of dough, a softer flour mix is used with 70% of semola and 30% of type 0 W260 flour.
Marta shapes a well in the flour, breaks the egg in, and adds the salt and olive oil. We mimic her: we slowly incorporate the egg to the flour using a fork until we get a dough. We knead it with the palm of our hands, adding a bit of flour when it gets too sticky. Once happy with the consistency, Marta hands us a plastic film to wrap up the ball of dough and let it rest for 10 to 15 minutes.
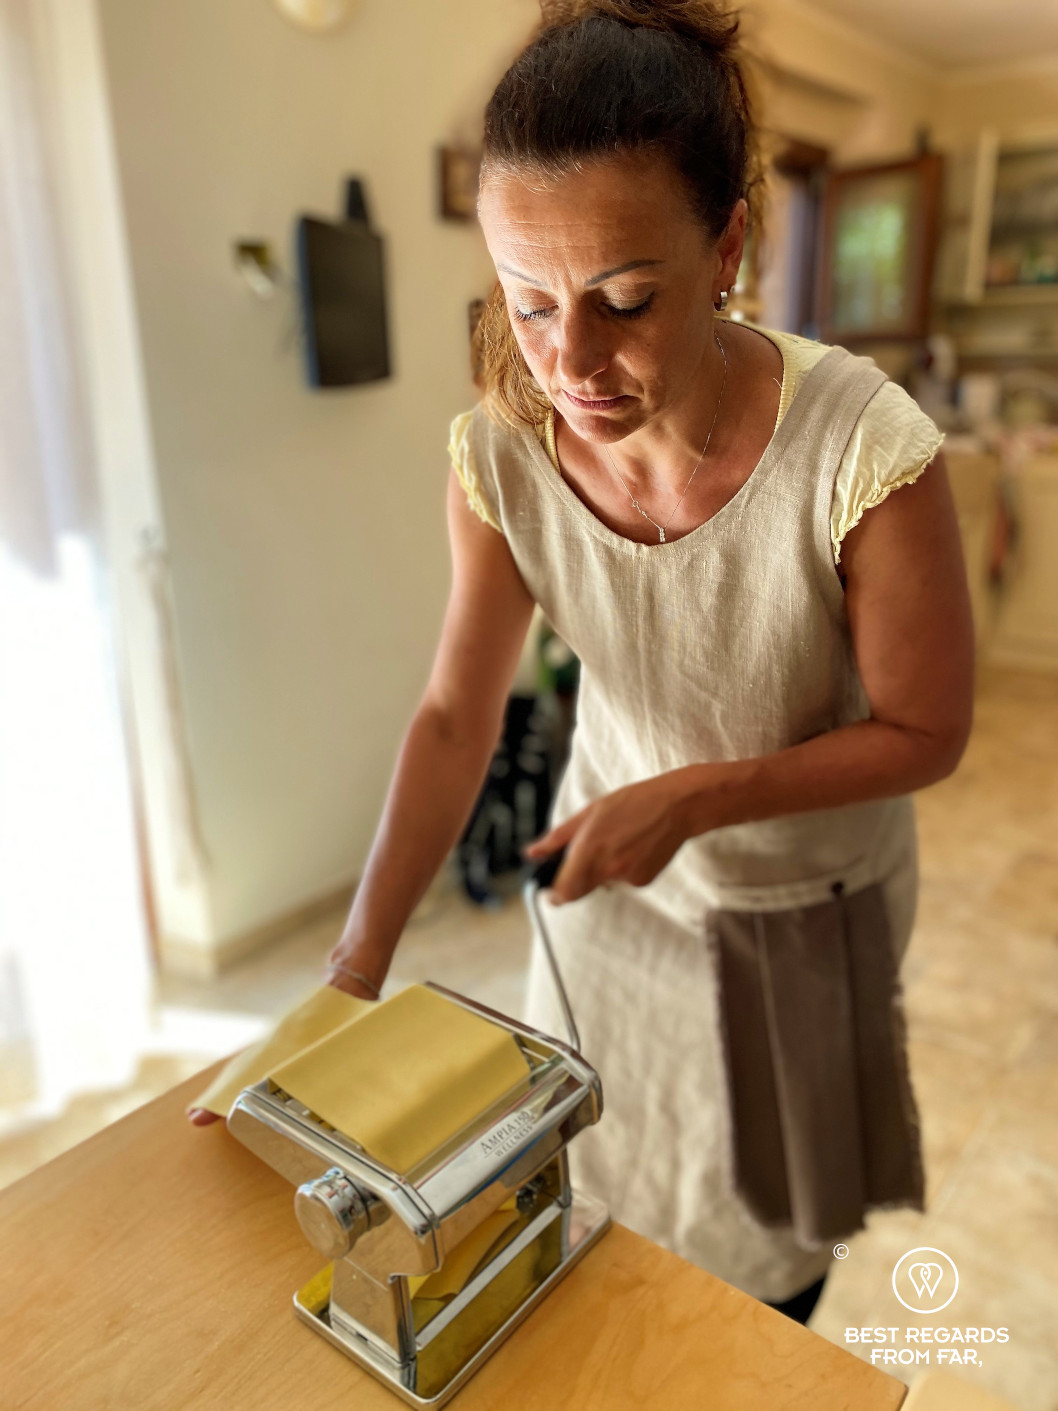


Then, she rolls out the dough before showing us how to use the pasta machine. She simply passes the dough through the machine to make it thinner and thinner by changing the setting to end with a dial 6 for raviolis.
Making the ravioli
The dough is ready to be filled. We place tablespoons of filling one inch apart along the length of the pasta strip. Then we fold the dough and softly press between the fillings to remove any air pockets and shape the raviolis, that are then cut with a pastry wheel.
The sauce
The sauce is simply butter (count 30 grams per person) and sage leaves (count 1.5 per person) let to slowly meltin a pan overa low fire.

Cooking
Marta boils salted water in a large pan, and then adds our raviolis. She counts four to six more minutes from the moment they surface. To make sure the cooking is right, we get one out and taste a small piece of the dough.
Serving
For a perfect serving, put the raviolis on a dish and pour the sauce on. Enjoy with graded Parmesan cheese!
Freezing
It is ok to freeze either the dough wrapped in the plastic film after it has rested or the pastas (tagliatelle or ravioli). For the pastas, Marta’s secret is to freeze them first on a tray, and once frozen to keep them in a plastic bag in your freezer.
The secrets of tagliatelle
The technique to make ravioli dough is the same as the one to make tagliatelle. Only the proportion of flour changes. For tagliatelle, Marta uses 70% of semola and 30% of type 0 flour.

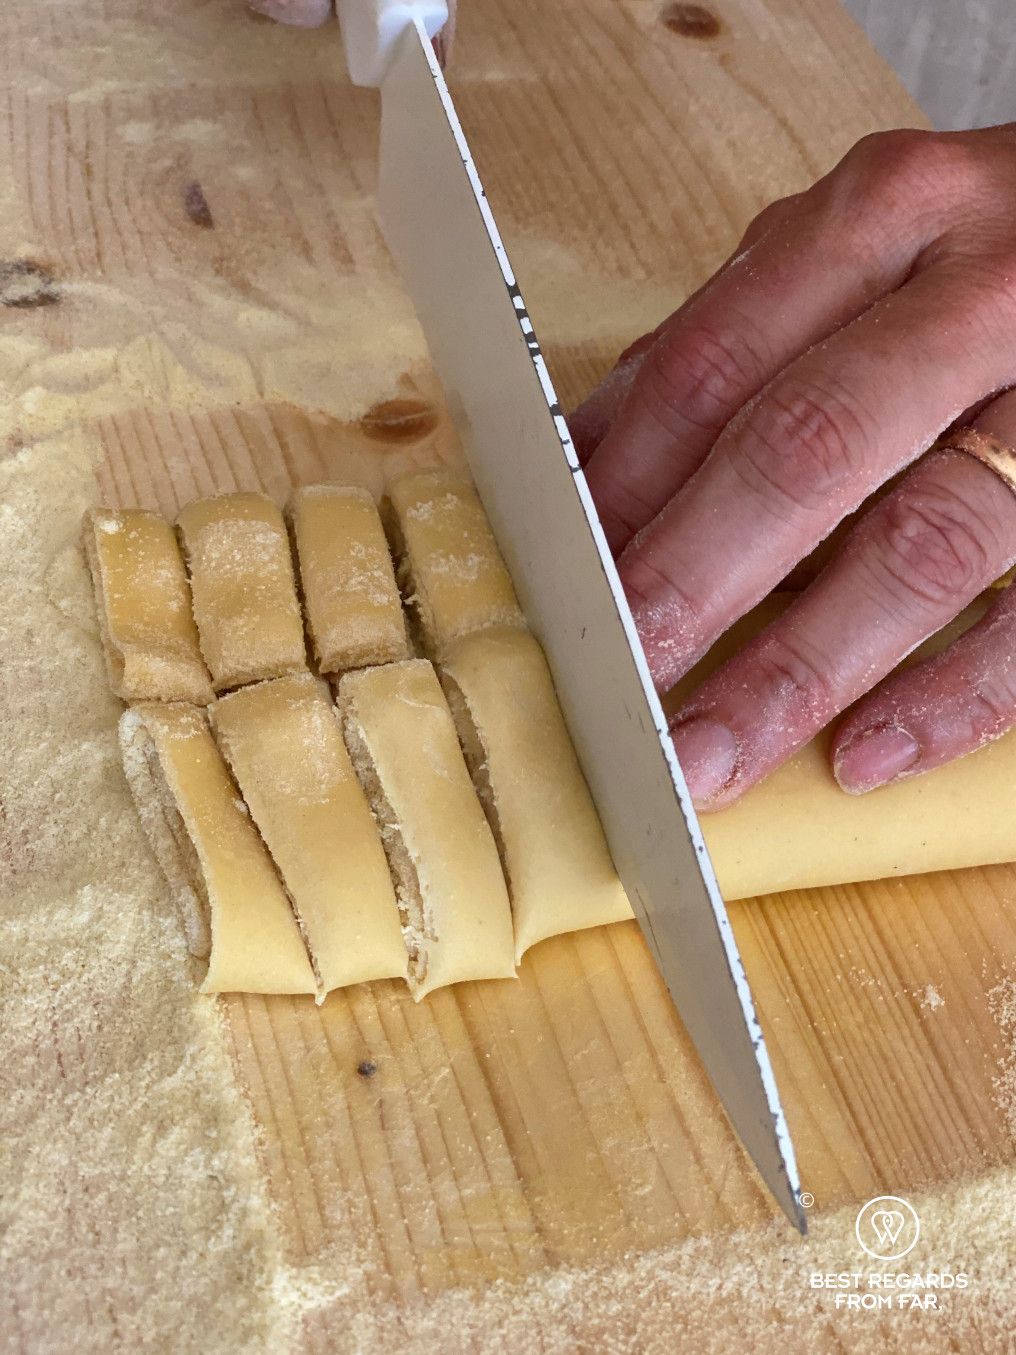

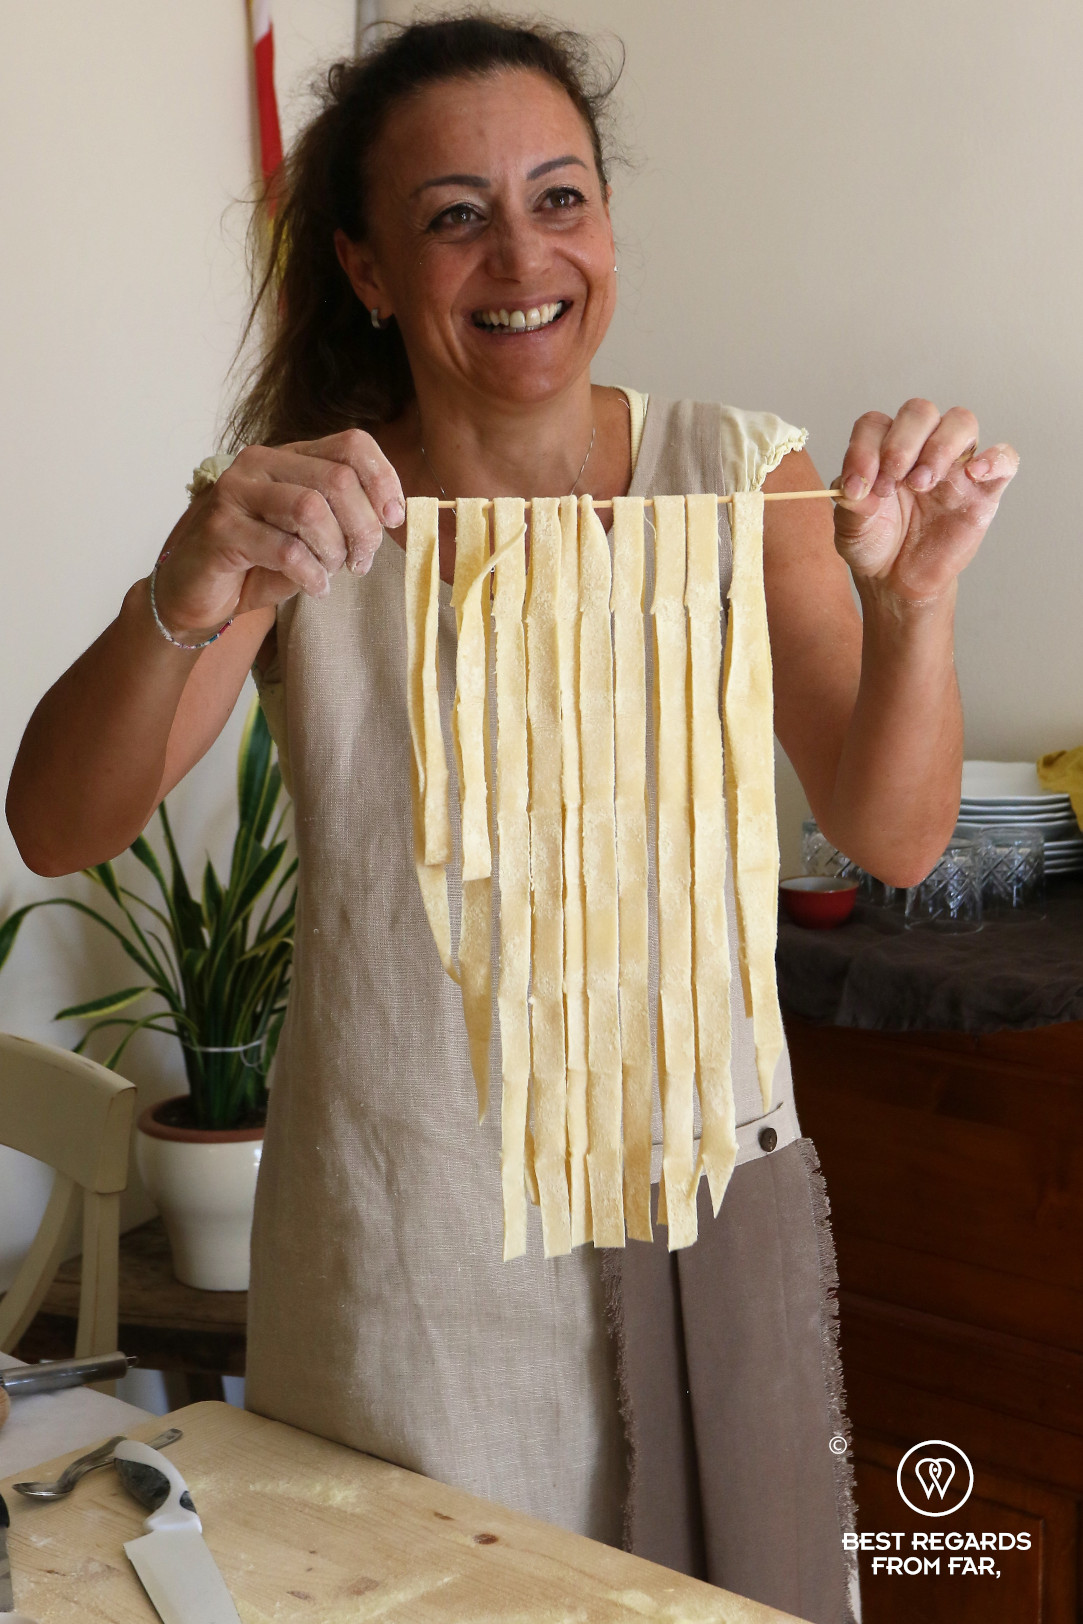
Once the dough is flattened in the pasta machine, Marta shows us how to shape the tagliatelle. She keeps folding the dough on itself, then cuts it perpendicularly, and slides a stick under the dough in the middle. Then, she lifts it all in a grin and the tagliatelle take shape magically under our eyes!
Matching the sauce with the pasta
Whether homemaking your pastas or visiting Italy and having a waiter take your primi order, matching the sauce is often challenging for foreigners. If there are no actual rules, here are some pairing recommendations with which you can’t go wrong:
- Spaghetti with pomarola sauce (Tuscan tomato sauce), or spaghetti aglio, olio e peperoncino(withgarlic, olive oil and hot chilli pepper),
- Tagliatelle with ragù (meat and vegetable sauce),
- Tortellini with ragù,
- Pappardelle al ragù di cinghiale (with wild boar meat sauce),
- Ravioli burro e salvia (with butter and sage sauce, see above),
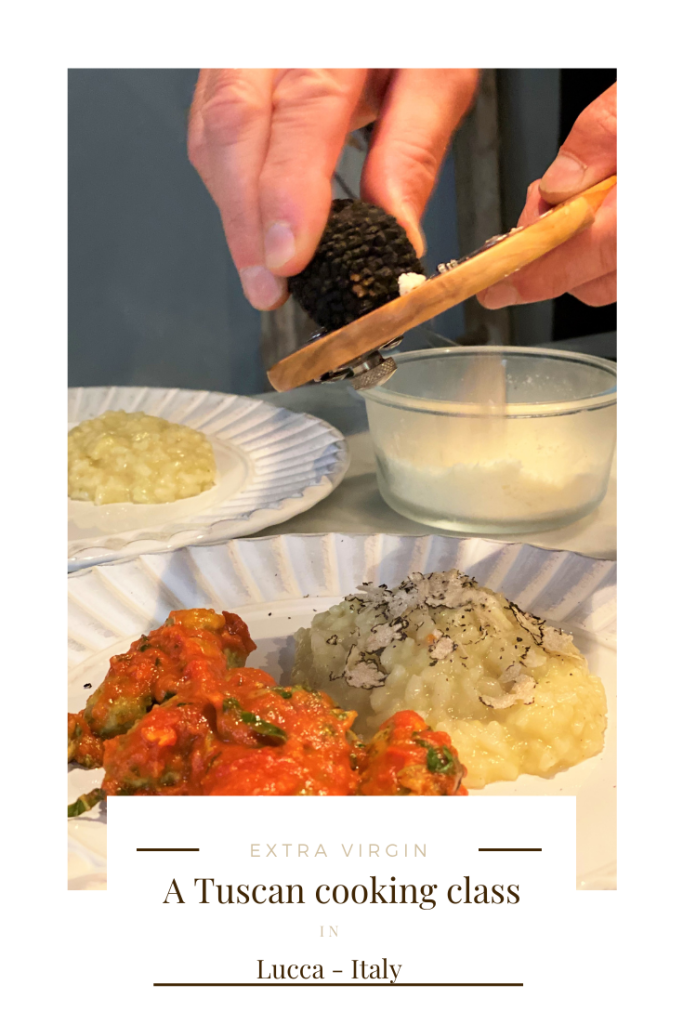
- Pici cacio e pepe (black pepper and cheese sauce), or Pici all’aglione (big local garlic sauce), or Pici Ragù bianco (white ragù), or Pici with truffle sauce.
Why does the cooking matter?
The way to cook pastas – whether they are homemade, artisanal or industrial – matters beyond their taste. Pasta needs to be cooked slightly al dente to be digested better. Overcooked pastas have a glue consistency because the gluten shield that traps starch is dissolved in the cooking water. The carbs get straight to the stomach giving the enzymes an overload of work and putting you to sleep!
When the pastas are al dente, the gluten shield allows a gradual and slower assimilation of the carbs avoiding a glycaemic peak.


Now you know all about pastas you are ready for a trip to Italy or to home make them yourself!
Travel tips:
- To learn it all from the chef, reach out to Marta Ciappi who also runs online classes.
- Check out this interactive map for the specific details to help you plan your trip and more articles and photos (zoom out) about the area! Here is a short tutorial to download it.
For more in Tuscany: